A place to share projects and information

Tag: woodworking

13th century style chest as a tool box.

Sketchup drawing of the chest to be built.

There are many options for tool chests. There’s the (very popular) Anarchist Tool chest, based on a traditional chest design originally seen in the 18th century. But they are big, bulky and difficult to transport. A scaled down version would be fine, and could be justified as period since there are similar chests in Durer woodcuts. There is the Dutch tool chest, also popularized by Chris Schwarz. I don’t care much for the slant top of the Dutch tool chest, so that design is out for me. I’ve done lots of Scandinavian chests, and we’re pretty sure the Mästermyr chest was used as a tool chest at the end of its life, but I wanted to do something new.

I’ve made several knock-down versions of the 13th and 14th century clamp-front chest, so for the last few years I’ve been thinking a tool chest version would be nice. My friend Angus has a nice tool chest of this design, so I thought “why not” and spend the early Spring of 2021 designing a chest.

I started with an image of a 13th century chest in the Victoria and Albert museum.
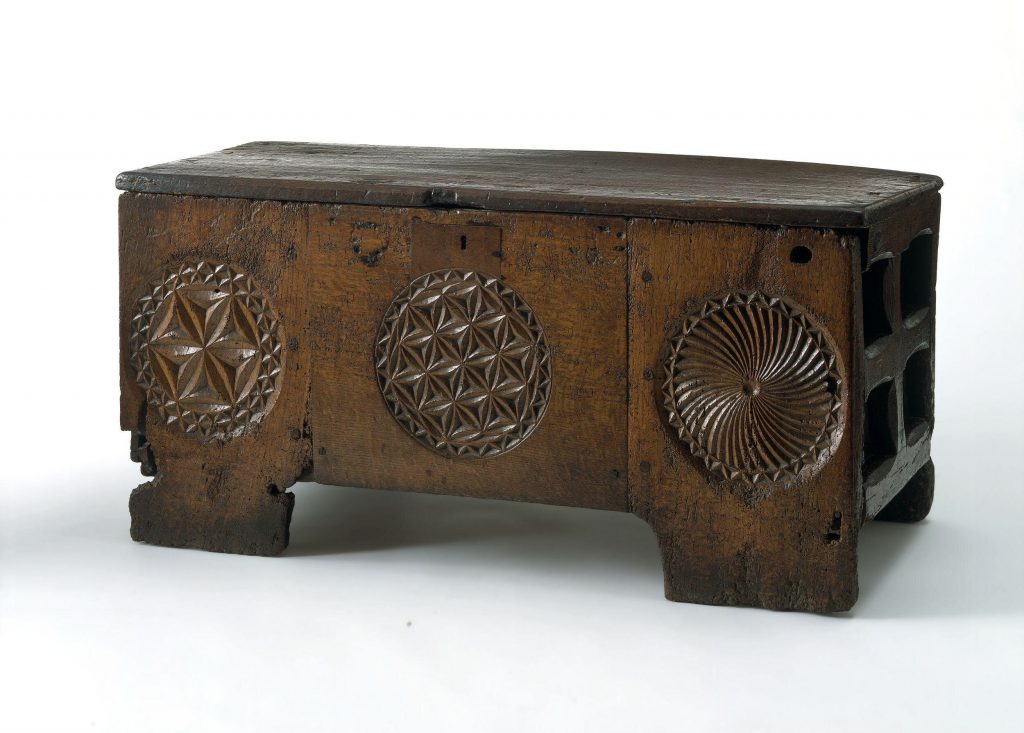
Chest from the V and A. See more info at http://collections.vam.ac.uk/item/O93911/chest-unknown/

The original chest is a little over a meter long, which seems to be a bit large for an easily transported tool chest. Using Sketchup, I scaled it down a bit so the width of the legs matched up to dimensional lumber. I mocked up the design in cardboard to get a sense of the interior size, and thought it would be just the right size for a traveling chest to hold a minimal set of tools.

The chest I constructed is known as a “clamp front” chest. This blog post from the Quiet Workshop, along with the follow-on posts, gives a nice overview and several examples of clamp-front chests. The “clamp” is a furniture term describing the way the front and back center panels are connected (clamped) between the legs on either side. These panels are mortised into the edges of the legs, and usually pinned in place with wooden dowels or nails. The front and back of the chest are tied together by flat boards on the ends and, in the case of the chest I built, a framework of overlapped thicker timber, also mortised into the front and back legs.

This diagram, taken from Church Chests of the Twelfth and Thirteenth Centuries in England by Philip Johnson (1907) shows the end construction of a similar chest. you can clearly see the construction of the framework on the end, along with the stub tenon that fits into a notch on the lid batten/hinge board. Not shown here, but clear in other chests of this type, is the the floor of the chest is supported by a groove in the lowest front-to-back framework piece.

End construction of an early 13th century chest at Stoke d’Abernon, Surrey

As much as I would have liked to build it out of oak, I took a lesson from past projects and further inspiration from Angus’ chest and decided to construct it out of southern yellow pine (SYP). My local builder’s supply stocks 2x material in SYP, so I purchased 3 eight foot lengths of 2x12s. I picked out the board with cleanest and most attractive grain to use for the legs. For the side and end panels, the second board and part of the third was resawn to produce 3/4 thick material.

Resawing setup. The board really is flat.

The resawn panels did cup a bit after sawing, so I had to rip them down to 5 to 6″ wide strips (which reduced the amount material that would be lost removing the cup), and glued them up into the 12″ to 13″ wide panels I needed. After gluing, the panels were planed down to a uniform 3/4″ thick to remove the resaw marks, and further reduce the cupping.

Next post – prepping the legs.

Three furniture projects for an outdoor kitchen: aubry cabinet

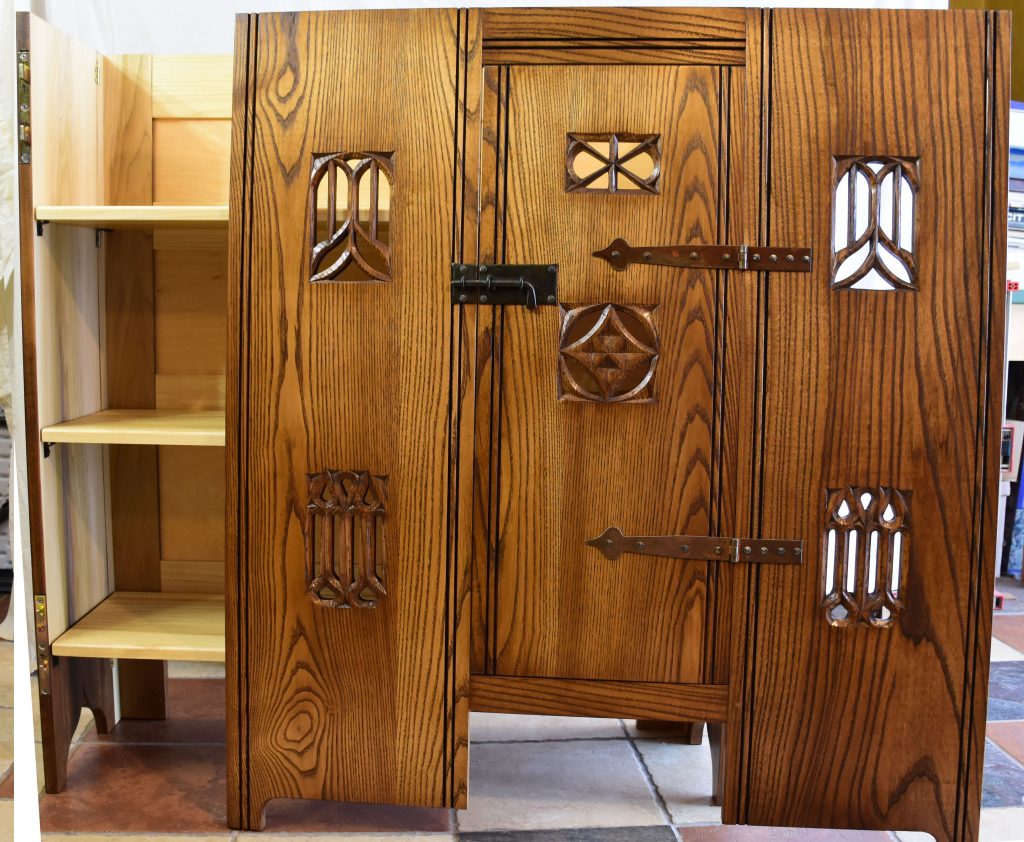
The least historically plausible piece of furniture is the aumbry cabinet – a 15th century form, usually used to store church vestments.

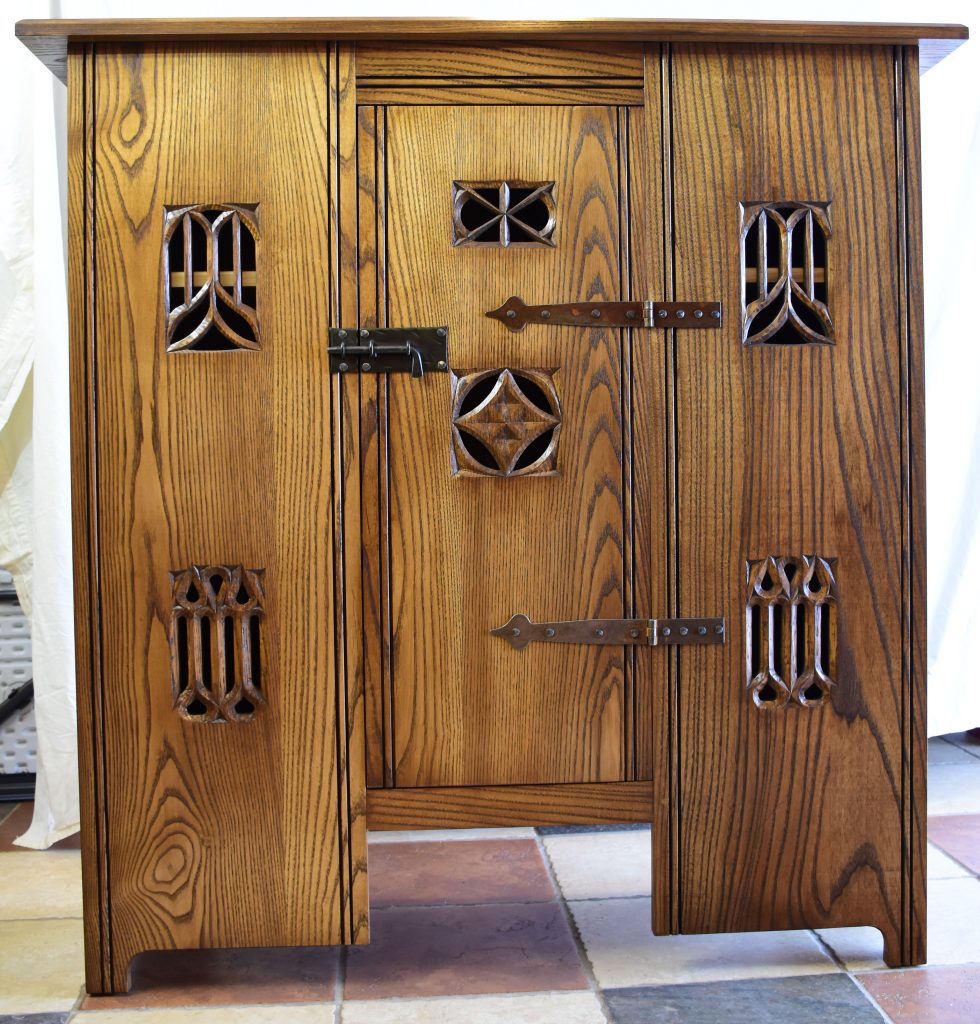
My aumbry cabinet assembled

Here are some historical examples.

a circa-1490 piece that was part of the Clive Sherwood collection sold at a Sotheby’s auction in 2002. (link from https://www.core77.com/posts/87776/Be-Honest-About-Your-Inspiration-or-Else) This was the historical exemplar that Chris Schwarz used to design the aumbry in the “The Anarchist’s Design Book” which provided some construction hints and templates for the tracery.
English aumbry c. 1490 from https://www.periodoakantiques.co.uk/antique-sales-archive/a-very-rare-english-oak-aumbry-circa-1490-27-stockno-1074/. I traced and modified the teardrop tracery design from this aumbry for mine.

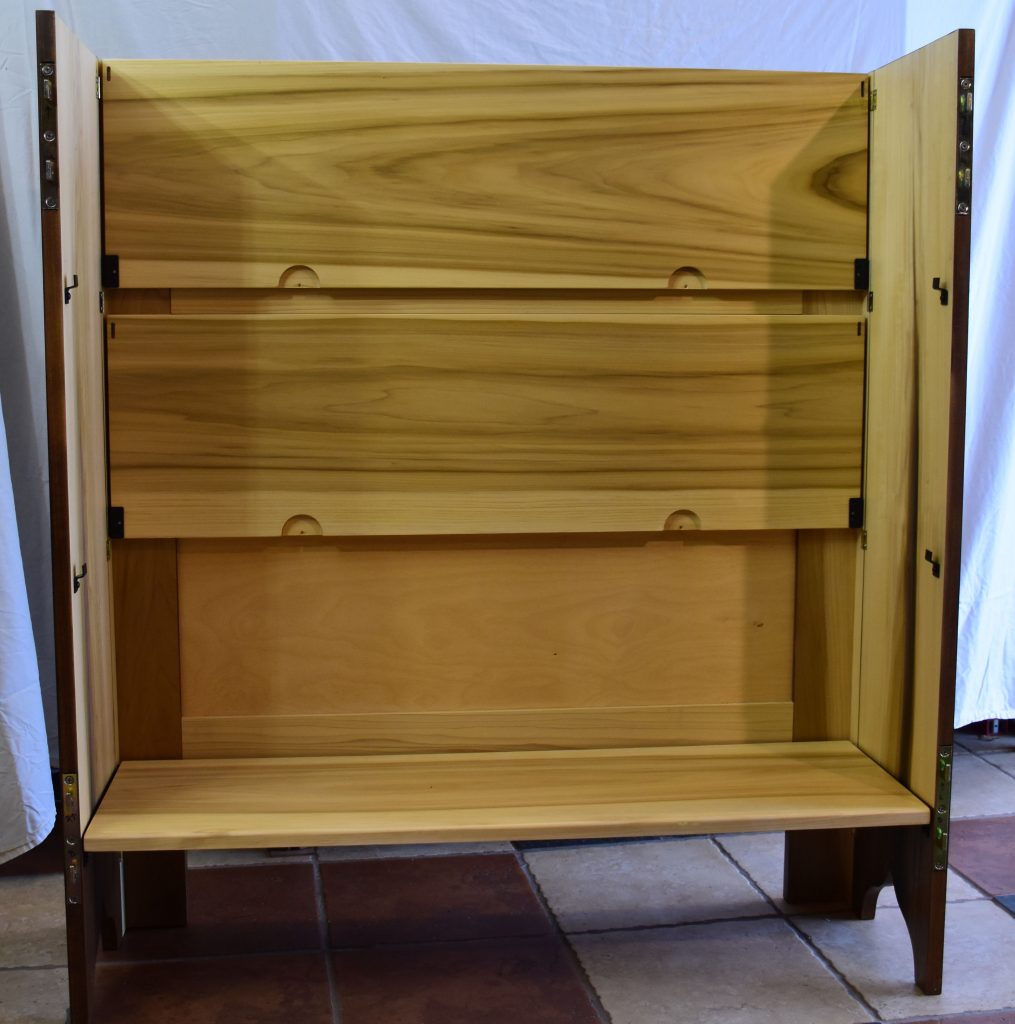
This was the most ambitious piece of the three I built – I don’t know that anyone has tried to make a knock-down aumbry cabinet in this style before; I certainly could not find a description of one. The basis for the cabinet is a combined back/sides and shelf unit that folds up. I’ll refer to this assembly as the carcass of the cabinet, since it can be separated from the face frame or front. The design is based on the ubiquitous folding bookshelf, except with a solid back and sides.

Fold-up bookshelf action of the cupboard carcass. After all 3 shelves are up, the side panels fold in. The semi-circular cutouts are clearance for the bent tabs that support the front of the shelves.

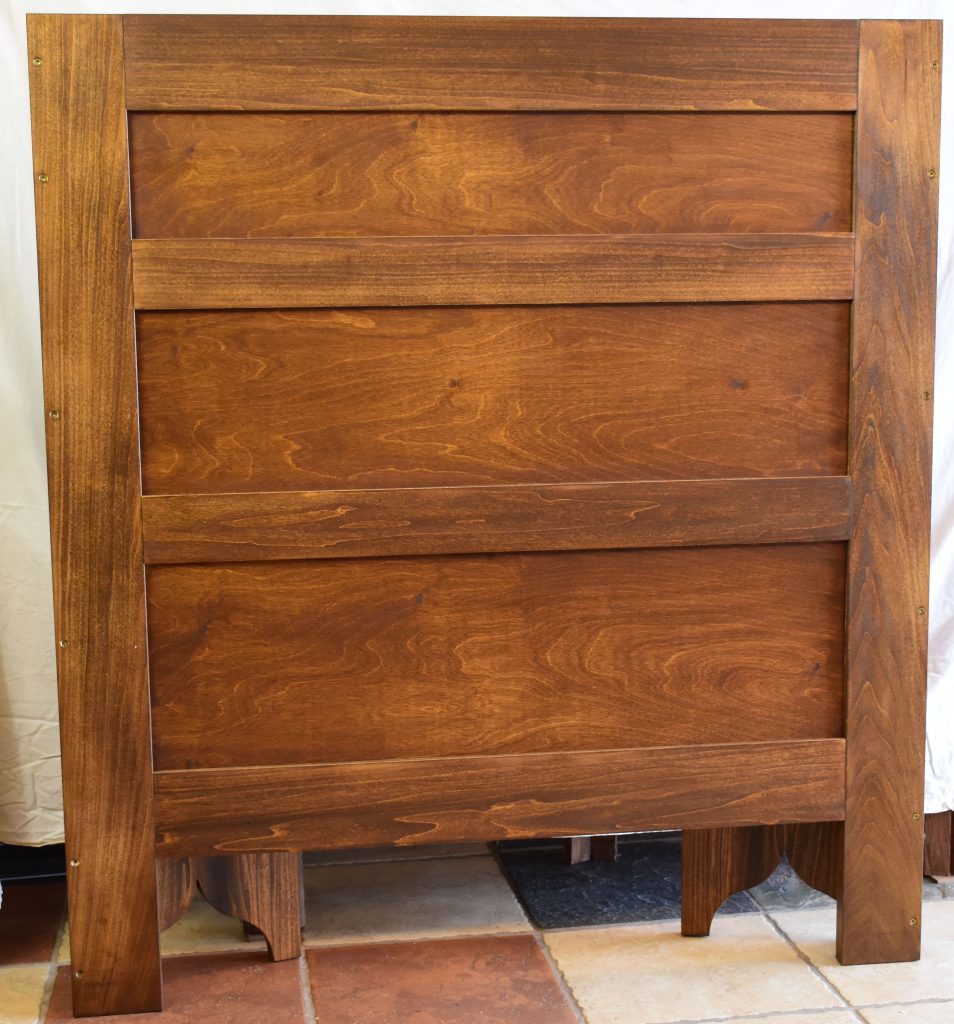
To reduce weight (which was only partially successful) the back is frame and panel construction, with the panels only 1/4 inch thick, and the frame pieces 7/8 inch thick. All of the carcass construction is poplar, with the outside stained to match the front and top and the interior kept natural. (The color match is better in real life. I think the flash made the back shown in the photo below much lighter and more red-toned than it is in person.)

Back frame and panel.

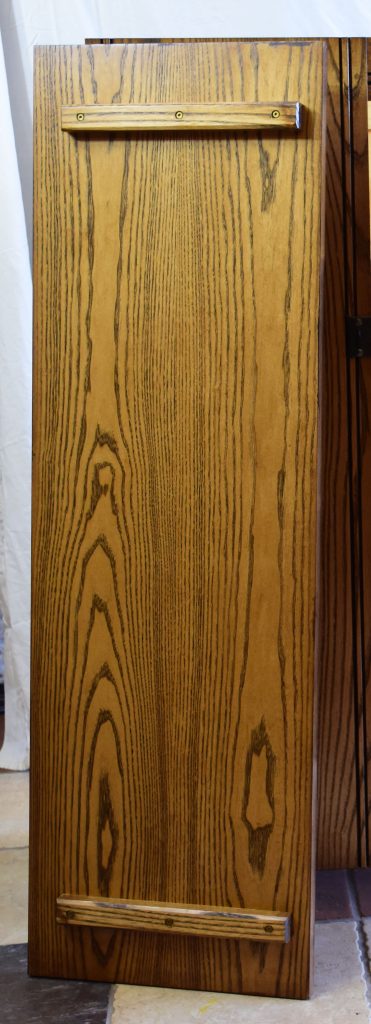
The top is removable; it is just held in place by two cleats that fit snugly into the top of the cabinet. The weight of the top also helps keep it in place. The top is 7/8 inch thick ash with a dark stain. I chamfered the top edge heavily to increase the visible weight. Extant examples are not chamfered, but the darker English aumbry shown above had complex molding to produce a similar affect.

Top of the cabinet removed showing the alignment/stiffening cleats on the underside.

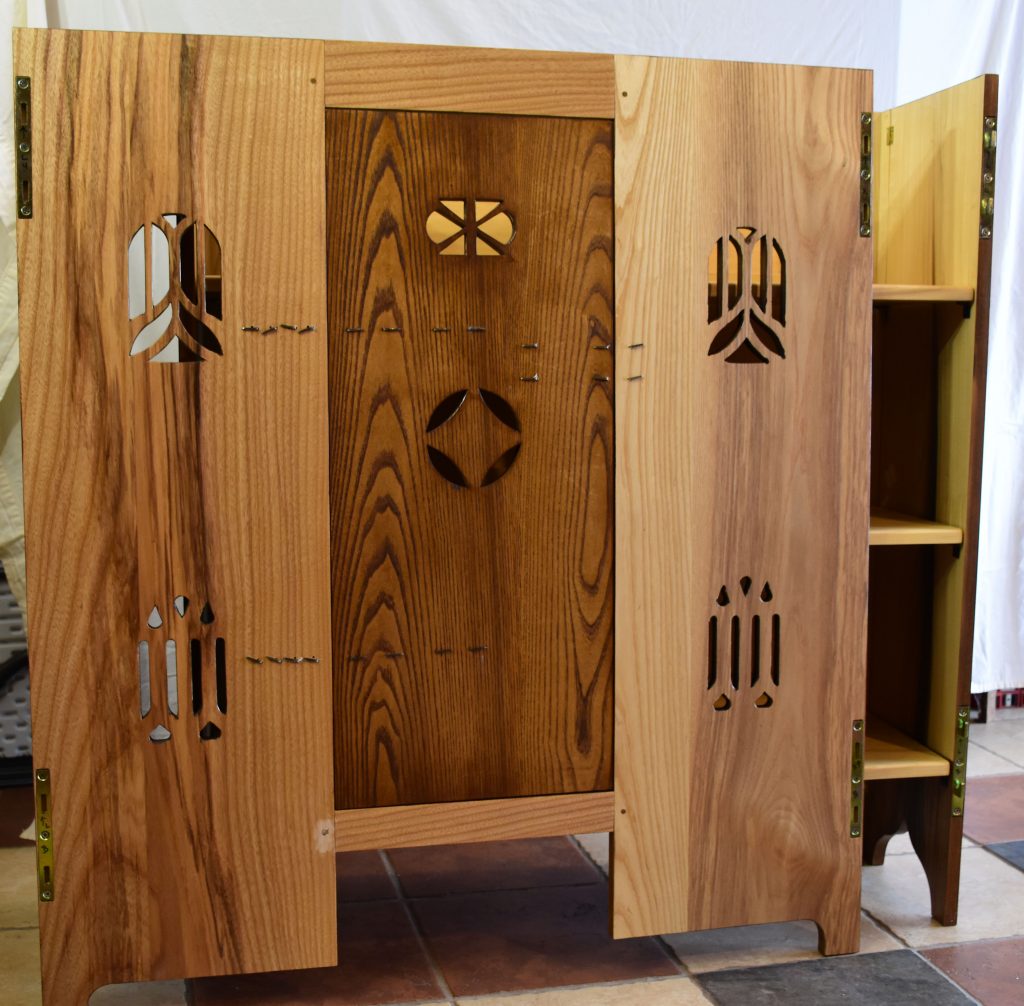
The front is two wide boards (stiles) connected by 2 narrower rails tenoned into the edges of the left and right panel. As Chris Schwarz describes it, the cupbuard front is really a giant face frame. The front and door are 3/4 inch thick ash with a dark stain on the exterior surfaces. Carving was completed before finishing and assembly, as was the scratch-stock molding. The gothic tracery carving was done with the technique presented in this video. Iron strap hinges (purchased years before from Lee Valley) and a blacksmith made latch were nailed on the front frame (with Rivierre nails), with the nails clenched into place.

Front detached from the carcass
Back of the front, showing the clenched nails. Only the door was stained on both sides in an effort to keep the interior as light in color as possible. You can clearly see the pegs that help hold the rails in place and the hardware to attach the front to the carcass.

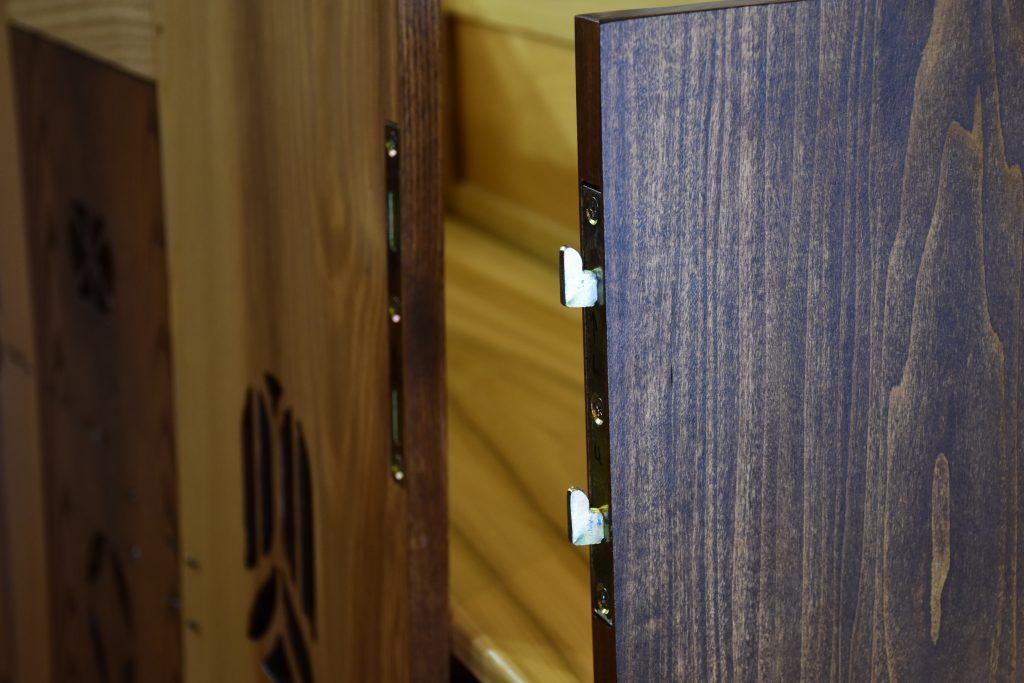
The hardware that allows the front to be removed is knock-down bed rail hardware. I had the idea for using it for the knock-down cooler chest, but I found there were better options for the chest. Other than trying the hardware on a small mock-up I didn’t know that any of this would work until all the assembly was done and the hardware installed. It turned out fine – it goes together very easily, and requires just a little persuasion to come back apart. The carcass folds up and is not too heavy to carry. The face frame is stiff enough to move easily, and with the latch in place the door doesn’t flop around when being transported. All-in-all a successful project. Now I just need an event to happen so I can try it out.

The key to disassembly – bed rail hardware. The hooks are on the carcass sides, which fold in for storage and transport. The plates are embedded into the front stiles, and are flush with the back surface. The weight of the front keeps the fasteners firmly connected.

© 2024 Wade’s Hobby Blog

Theme by Anders NorenUp ↑