There are many options for tool chests. There’s the (very popular) Anarchist Tool chest, based on a traditional chest design originally seen in the 18th century. But they are big, bulky and difficult to transport. A scaled down version would be fine, and could be justified as period since there are similar chests in Durer woodcuts. There is the Dutch tool chest, also popularized by Chris Schwarz. I don’t care much for the slant top of the Dutch tool chest, so that design is out for me. I’ve done lots of Scandinavian chests, and we’re pretty sure the Mästermyr chest was used as a tool chest at the end of its life, but I wanted to do something new.
I’ve made several knock-down versions of the 13th and 14th century clamp-front chest, so for the last few years I’ve been thinking a tool chest version would be nice. My friend Angus has a nice tool chest of this design, so I thought “why not” and spend the early Spring of 2021 designing a chest.
I started with an image of a 13th century chest in the Victoria and Albert museum.

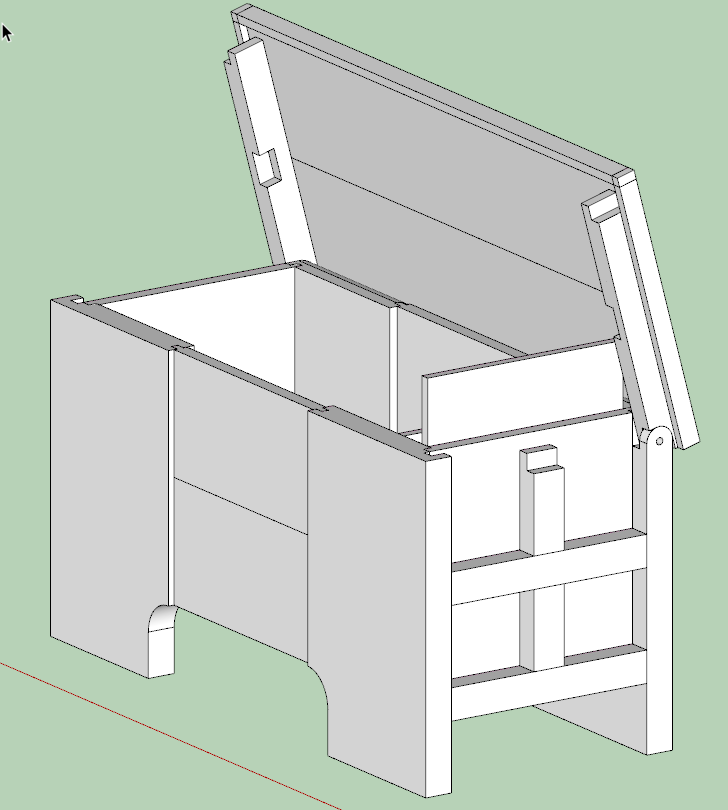
The original chest is a little over a meter long, which seems to be a bit large for an easily transported tool chest. Using Sketchup, I scaled it down a bit so the width of the legs matched up to dimensional lumber. I mocked up the design in cardboard to get a sense of the interior size, and thought it would be just the right size for a traveling chest to hold a minimal set of tools.
The chest I constructed is known as a “clamp front” chest. This blog post from the Quiet Workshop, along with the follow-on posts, gives a nice overview and several examples of clamp-front chests. The “clamp” is a furniture term describing the way the front and back center panels are connected (clamped) between the legs on either side. These panels are mortised into the edges of the legs, and usually pinned in place with wooden dowels or nails. The front and back of the chest are tied together by flat boards on the ends and, in the case of the chest I built, a framework of overlapped thicker timber, also mortised into the front and back legs.
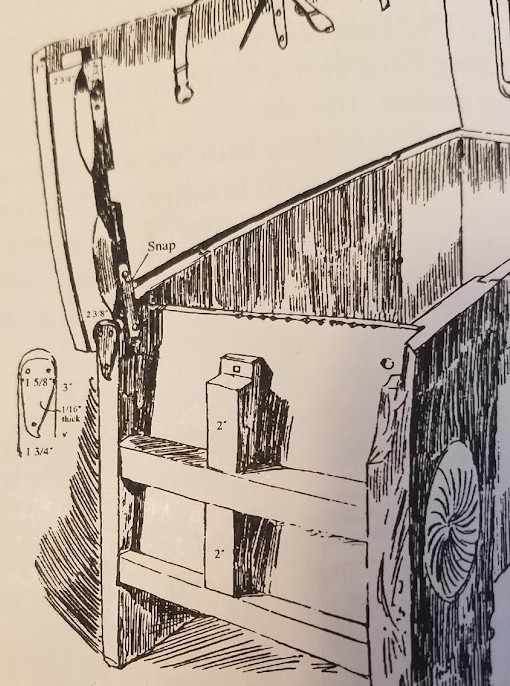
This diagram, taken from Church Chests of the Twelfth and Thirteenth Centuries in England by Philip Johnson (1907) shows the end construction of a similar chest. you can clearly see the construction of the framework on the end, along with the stub tenon that fits into a notch on the lid batten/hinge board. Not shown here, but clear in other chests of this type, is the the floor of the chest is supported by a groove in the lowest front-to-back framework piece.
As much as I would have liked to build it out of oak, I took a lesson from past projects and further inspiration from Angus’ chest and decided to construct it out of southern yellow pine (SYP). My local builder’s supply stocks 2x material in SYP, so I purchased 3 eight foot lengths of 2x12s. I picked out the board with cleanest and most attractive grain to use for the legs. For the side and end panels, the second board and part of the third was resawn to produce 3/4 thick material.

The resawn panels did cup a bit after sawing, so I had to rip them down to 5 to 6″ wide strips (which reduced the amount material that would be lost removing the cup), and glued them up into the 12″ to 13″ wide panels I needed. After gluing, the panels were planed down to a uniform 3/4″ thick to remove the resaw marks, and further reduce the cupping.
Next post – prepping the legs.