These more-or-less self-contained Mästermyr instructions will take you through the steps of laying out and constructing the trapezoidal-style chest.
In this section, I’m going to discuss some of the differences between the 3 historical chests, and some overall design considerations for construction.
Oseberg 178.
This is the simplest of the 3 chests for several reasons. Let’s take a look at some of the archeological drawings and photographs.
Figure 6 – conservation drawings for Oseberg 178.
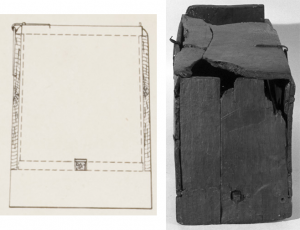
Figure 7 – zoom in of conservation drawing of the end of the Oseberg chest 178, along with a photograph of the end of the chest.
Figure 8 – photo of the bottom of the chest.
Things to note with this chest – as will all 3 of these chests, the bottom of the front and back is flush with the bottom of the floor of the chest. There is a very shallow rabbet along the sides which can easily be skipped in construction. It’s also not shown in Figure 7, so the conservation drawings are not clear. The simplifying detail is the joint between the sides and the ends of the chest – the notch in the ends corresponds to the bottom of the sides, therefore no notch is needed in the sides – they are just plain trapezoidal pieces. There is also a shallow dado in the ends to house the floor, but unlike the other two chests, it does not have to be “blind,” so if you choose to cut this in, it’s much easier to create.
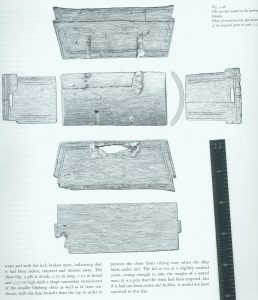
Now, let’s look at a drawing of the Hedeby sea-chest:
 Figure 9 – Hedeby Sea-Chest drawing from Crumlin-Pedersen. Note the drawing is scaled, so the ruler was included in the scan to pull dimensions from the drawing.
The major difference with this chest and the Mästermyr chest is the lack of rabbets on the front and back boards to mate with the ends, and the design of those side boards that dip below the floor of the chest at the ends
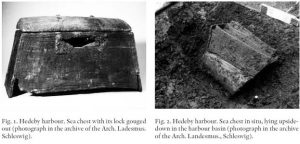
Figure 10 – Photo of the chest from the museum.
Here’s a link to my older handout on building the Mastermyr style chest. This will walk you through construction of the slightly more complicated chest.

